使用 AFL 进行模糊测试

American Fuzzy Lop 中介绍了 AFL 的原理和特性,下面将使用 AFL 对几个常用的应用程序进行模糊测试。

0x01 AFL 安装与使用

首先下载 AFL 源码 进行安装。

1
2
$ make
$ make install

若程序从 stdin 中获取输入,则 afl-fuzz 的使用方法如下:

1
2
./afl-fuzz -i testcase_dir -o findings_dir -- \
/path/to/tested/program [...program's cmdline...]

若程序从文件中获取输入,则在命令行部分输入 “@@” 字符作为占位符,afl-fuzz 会自动用输入文件名将其替换。

0x02 模糊测试

1. 测试 libtiff

1)安装 libtiff

下载 libtiff 源码,并使用 afl-gcc 编译。

1
2
3
CC=/usr/local/bin/afl-gcc CXX=/usr/local/bin/afl-g++ ./configure --disable-shared
make clean
make

编译好后,可执行文件在 tools 文件夹中。

1
2
3
4
5
6
7
8
9
10
11
12
13
14
~/tiff-4.0.9/tools$ ls
CMakeLists.txt pal2rgb.o tiff2pdf.c tiffcp.o tiffinfo.o
fax2ps ppm2tiff tiff2pdf.o tiffcrop tiffmedian
fax2ps.c ppm2tiff.c tiff2ps tiffcrop.c tiffmedian.c
fax2ps.o ppm2tiff.o tiff2ps.c tiffcrop.o tiffmedian.o
fax2tiff raw2tiff tiff2ps.o tiffdither tiffset
fax2tiff.c raw2tiff.c tiff2rgba tiffdither.c tiffset.c
fax2tiff.o raw2tiff.o tiff2rgba.c tiffdither.o tiffset.o
Makefile rgb2ycbcr.c tiff2rgba.o tiffdump tiffsplit
Makefile.am thumbnail.c tiffcmp tiffdump.c tiffsplit.c
Makefile.in tiff2bw tiffcmp.c tiffdump.o tiffsplit.o
Makefile.vc tiff2bw.c tiffcmp.o tiffgt.c
pal2rgb tiff2bw.o tiffcp tiffinfo
pal2rgb.c tiff2pdf tiffcp.c tiffinfo.c

2)模糊测试

下面对 tools 文件夹中的 tiff2bw 进行模糊测试。首先新建 2 个文件夹用于存放输入和输出文件。

1
$ mkdir tiff_input tiff_output

从AFL 官网下载 测试样例 ,然后将 afl_testcases\tiff\full\images 目录下的文件复制到 tiff_input 中,最后运行 afl-fuzz 进行测试。

1
afl-fuzz -i tiff_input -o tiff_output -- ./vultarget/tiff-4.0.9/tools/tiff2bw @@ /dev/null

其中,-i 指定测试样本的路径;-o 指定输出结果的路径;/dev/null 使错误信息不输出到屏幕。

afl-fuzz 跑了 12 个小时仍没有发现 crash。
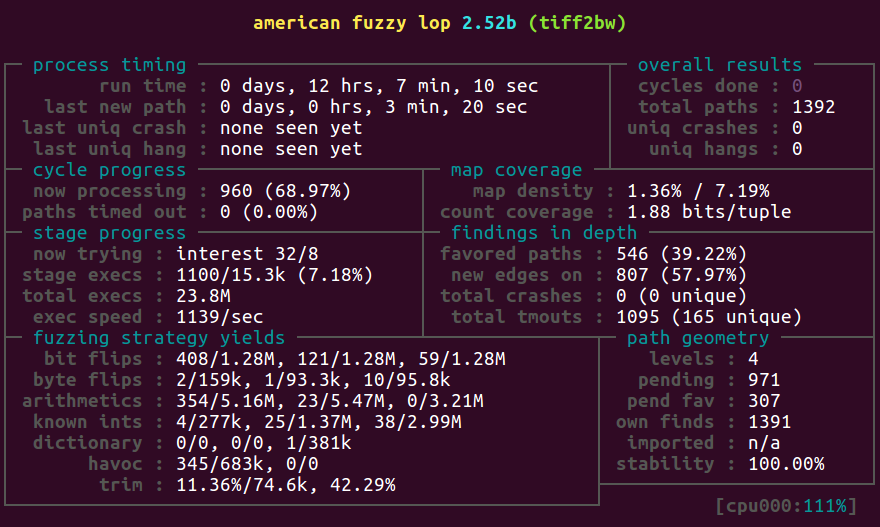
2. 测试 ImageMagick

1)安装 ImageMagick

首先,使用以下命令下载、编译和安装 ImageMagick。

1
2
3
4
git clone https://github.com/ImageMagick/ImageMagick.git
cd ImageMagick
CC=/usr/local/bin/afl-clang CXX=/usr/local/bin/afl-clang++ ./configure --disable-shared
make

2)测试样例

测试样例获取
高质量的测试样例可提高模糊测试的效率,可以使用 MozillaSecurity 提供的开源测试样本进行测试。

此外,还可以从 ImageMagick 的漏洞提交 issue 中找到大量的测试样例。
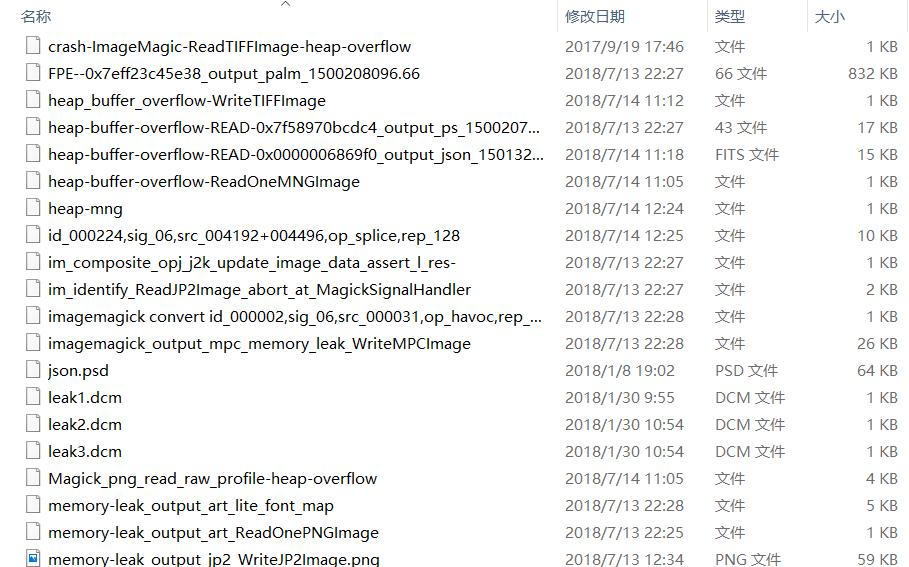
测试样例预处理
在使用这些测试样例之前,先进行以下预处理可提高测试效率。

  • 生成不同格式的样例;
  • 使用 afl-tmin 减小测试样例的大小;
  • 使用 afl-cmin 减小测试样例的数量;

通过以下脚本可完成预处理。

1
2
3
4
5
6
7
8
9
10
11
12
13
14
15
16
17
18
19
20
21
22
23
24
25
26
27
28
29
30
31
32
33
34
35
36
37
38
39
40
41
42
43
44
45
46
47
48
49
50
51
52
53
54
55
56
57
58
import os
import sys
import shutil
def cmin():
command = ' -m 300 -t 5000 ./utilities/magick convert @@ /dev/null'
os.system('afl-cmin -i seeds/tmin -o seeds/cmin ' + command)
def tmin():
command = ' -m 300 -t 5000 ./utilities/magick convert @@ /dev/null'
seed_list = os.listdir('seeds/all_format')
for seed in seed_list:
in_file = os.path.join('seeds/all_format', seed)
out_file = os.path.join('seeds/tmin', seed)
if os.path.getsize(in_file) > 1024*1:
if os.path.getsize(in_file) < 1024*3 and not seed.endswith('.txt'):
os.system('afl-tmin -i ' + in_file + ' -o ' + out_file + command)
print('afl-tmin -i ' + in_file + ' -o ' + out_file + command)
else:
pass
elif os.path.getsize(in_file) > 0:
shutil.copyfile(in_file,out_file)
else:
pass
def convert(origin_seeds):
seed_list = os.listdir(origin_seeds)
for seed in seed_list:
seed_in = os.path.join(origin_seeds, seed)
file_name = (os.path.splitext(seed)[0])
coder_list = os.listdir('coders')
for cfile in coder_list:
if cfile.endswith('.c'):
extern = cfile[:cfile.find('.c')]
seed_out = 'seeds/all_format/' + file_name + '.' + extern
os.system('utilities/magick convert ' + seed_in + ' ' + seed_out)
if __name__ == '__main__':
if len(sys.argv) < 2:
print 'Usage: ' + sys.argv[0] + ' origin_seeds_dir'
else:
origin_seeds_dir = sys.argv[1]
try:
os.mkdir('seeds')
seeds_path = os.path.join(os.path.abspath('.'),'seeds')
os.mkdir(os.path.join(seeds_path,'all_format'))
os.mkdir(os.path.join(seeds_path,'cmin'))
os.mkdir(os.path.join(seeds_path,'tmin'))
except:
print 'make dir fail!'
convert(origin_seeds_dir)
tmin()
cmin()

3)模糊测试

程序运行模型一般为以下形式:

输入-> 解析(Parse) -> 处理(Process) -> 数据组装(Reassemble) -> 输出

对于 ImageMagick 而言,其 identify 命令可用户获取图片的属性,只会进行解析;convert 可转换图像格式和大小,以及进行各种处理,如果将处理结果输出到 /dev/null 则不进行写操作,如果使用 convert in.png out.jpg 则可触发写,即可覆盖更多的代码。

使用不同命令参数也可以触发更多的代码。

1
2
3
4
5
afl-fuzz -i input -o output ./magick convert @@ /dev/null
afl-fuzz -i input -o output ./magick composite @@ /dev/null
afl-fuzz -i input -o output ./magick compare @@ /dev/null
afl-fuzz -i input -o output ./magick montage @@ /dev/null
afl-fuzz -i input -o output ./magick identify @@ /dev/null

接下来开始进行模糊测试,首先新建测试样本文件夹和测试结果文件夹,然后将前面得到的测试样本放入 image_input 文件夹中,最后使用以下命令同时运行多个 fuzzer。

1
2
3
4
5
$ mkdir input output
$ afl-fuzz -i input/min_input -o output -M fuzzer01 -t 4000 -m 200 ./vultarget/ImageMagick/utilities/magick convert @@ out.jpg
$ afl-fuzz -i input/min_input -o output -S fuzzer02 -t 4000 -m 200 ./vultarget/ImageMagick/utilities/magick convert @@ out.jpg
$ afl-fuzz -i input/min_input -o output -S fuzzer03 -t 4000 -m 200 ./vultarget/ImageMagick/utilities/magick convert @@ out.jpg

afl-fuzz 参数说明:

  • -i:指定测试样本所在目录;
  • -o:指定测试结果存放目录;
  • -M:运行主(Master) Fuzzer;
  • -S:运行从属(Slave) Fuzzer;
  • -t:设置程序运行超时值,单位为 ms;
  • -m:最大运行内存,单位为 MB;

测试过程中,需要注意的是 ImageMagick 在运行时会在 /tmp 目录下生成大量的临时文件,使得磁盘空间爆满,最终会导致 afl-fuzz 停止运行。为保证 afl-fuzz 能正常运行,需要使用以下脚本删除这些临时文件。

1
2
3
4
5
6
7
8
9
10
11
12
13
14
import os
import time
if __name__ == '__main__':
while True:
file_list = os.listdir('/tmp')
for file_index in file_list:
if file_index.startswith('magick'):
try:
os.remove('/tmp/' + file_index)
except:
pass
time.sleep(10)

运行三个 fuzzer 同时跑了 1 天 18 小时之后发现了一个 2 crash。
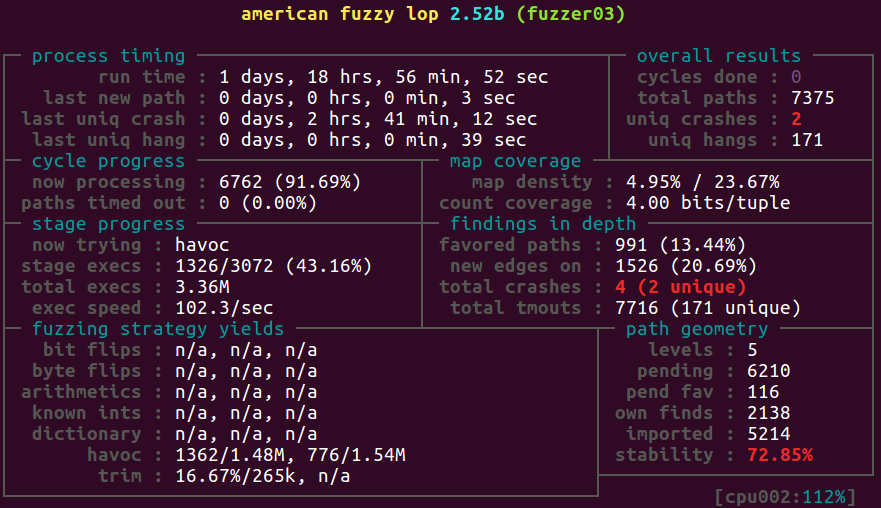
3. 测试 UPX

1)安装 UPX

首先获取 upx 的源码,默认分支的版本为 3.94,修改编译选项:

1
2
3
4
5
6
7
$ git clone https://github.com/upx/upx.git
$ cd upx
$ vim Makefile
$ CC = /usr/local/bin/afl-gcc # 添加该语句
$ cd upx
$ vim Makefile
$ CXX ?= /usr/local/bin/afl-g++ # 修改 CXX

执行以下语句获取 lzma-sdk。

1
git submodule update --init --recursive

此外,还需要下载安装 UCL,并设置环境变量 。

1
2
3
4
5
$ cd ucl-1.03
$ ./configure
$ make
$ sudo make install
$ export UPX_UCLDIR=/path/to/ucl-1.03

最后编译 upx,编译完后在 /src 目录下会生成可执行文件 upx.out。

1
$ make all

2)模糊测试

编译完后进行模糊测试。

1
2
3
$ mkdir upx_in upx_out
$ cp /bin/touch upx_in
$ afl-fuzz -i upx_in -o upx_out -m 300 -t 300000 -- vultarget/upx/src/upx.out @@

afl-fuzz 跑了一段时间后,发现了 11 个 crashes(upx 3.94)。对 crashes 分析后发现只有一个样例可触发 bug,但是该 bug 已经在 3.95 中修复了。

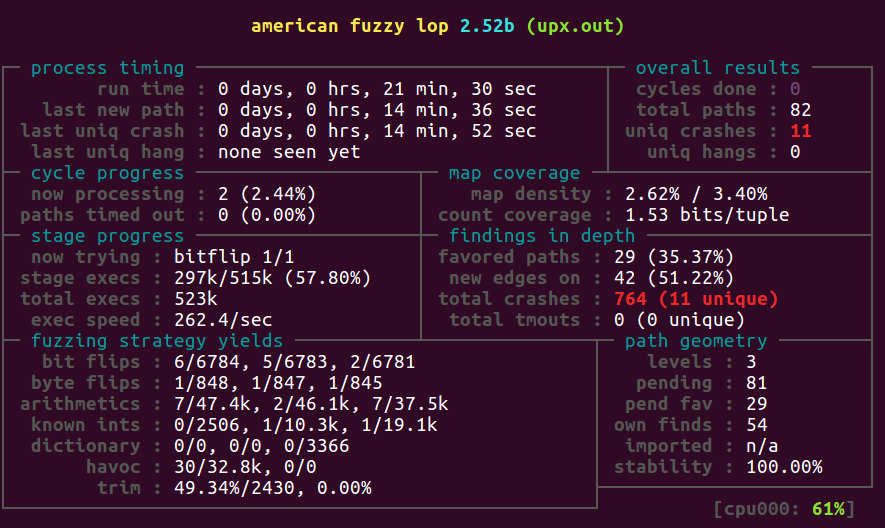
使用以下命令可切换到最新版本所在的分支,从中可看到 bug 已被修复。

1
$ git checkout devel

0x03 Fuzz 技巧

  • 在开源项目提交漏洞的 issue 里能看到这些漏洞是怎么发现的,以及还能收集一些样本,可参考这些方法进行 Fuzz。
  • 对于开源项目,分析源码与 Fuzz 是相辅相成的,通过分析源码可找到合适的 Fuzz 入口和构造高质量的 Fuzz 样本。
  • Fuzz 时可设置一些功能选项可提高代码覆盖率。
  • 模糊测试文件和网络协议等高度结构化数据时,通过构造合适的字典可提高代码覆盖率。

References:
[1] american fuzzy lop (2.52b)
[2] AFL–American Fuzzy Lop
[3] 如何使用Fuzzing挖掘ImageMagick的漏洞
[4] Fuzzing 模糊测试之数据输入